
Etch WordPress Tutorial for Beginners (Step-by-Step)
Building a WordPress website can feel complicated when you want more control over your design without spending hours writing code. Etch offers a visual way to build pages while giving you access to the underlying HTML and CSS. However, if you have never used it before, knowing where to start can be challenging.
This Etch WordPress tutorial for beginners takes you through the process from installation to publication. Instead of exploring every advanced feature at once, you will build one practical page with a hero section, three feature cards, and a call-to-action button.
You will also learn the basic concepts behind the builder, check your design on mobile, and see how Etch works with the WordPress block editor. By the end, you should have a clear starting point for building your own layouts.
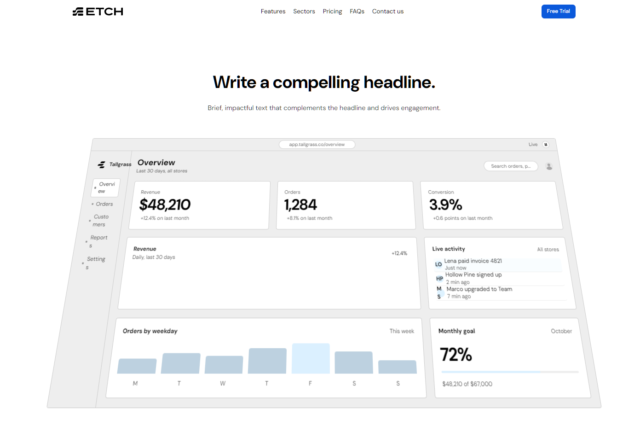
Completed sample landing page built with Etch for WordPress
What You Need Before Starting
Before you start building, prepare your WordPress website and check that your setup meets Etch’s current requirements.
A WordPress website
You need an existing WordPress installation with access to the administration dashboard. If you already manage a website, you can use it, but a staging site is a safer choice for your first attempt.
A staging site lets you experiment without affecting your live pages. If your hosting provider offers one-click staging, create a copy of your website before installing new tools.
The Etch plugin and companion theme
Etch uses a plugin for its builder functionality and a companion WordPress theme. You will install both during this tutorial.
You can find the installation instructions in the official Etch documentation.
An Etch account and license
According to the current documentation, you need to claim a free Etch Theme license to enable theme auto-updates. The exact account and license workflow may change, so follow the current official instructions rather than relying on an old screenshot.
Basic HTML and CSS knowledge
You do not need to be an experienced developer to begin. The visual interface helps you create layouts, and you can adjust styling without writing every rule manually.
Still, a basic understanding of HTML elements, CSS classes, spacing, and responsive layouts will make the learning process easier.
Step 1: Install the Etch Plugin
The first step is to install and activate the Etch plugin.
- Log in to your WordPress dashboard.
- Open Plugins and select Add New Plugin.
- If the current distribution provides a downloadable ZIP file, select Upload Plugin.
- Choose the official Etch plugin ZIP file from your computer.
- Select Install Now.
- When WordPress finishes installing it, click Activate Plugin.
Use the official download supplied through Etch’s current website or account process. Avoid downloading plugin ZIP files from unfamiliar websites.
If your dashboard provides a different installation route, follow the instructions for your current release.
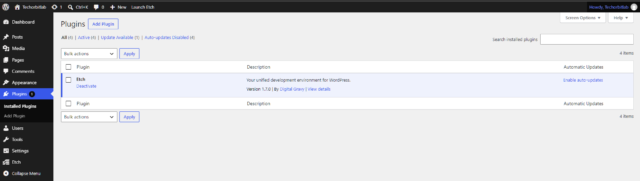
After activation, check that WordPress reports the plugin as active. You may not see every Etch feature immediately because the companion theme and license setup come next.
What if the installation fails?
First, check that you downloaded the correct file. Some download packages contain documentation or additional files rather than the installable plugin ZIP.
If WordPress reports a file-size limit or upload error, check your hosting provider’s upload restrictions. If the plugin reports a PHP or WordPress compatibility issue, compare your environment with the official requirements.
Do not repeatedly reinstall the plugin without reading the error message. The message often tells you what needs attention.
Step 2: Install the Etch Theme
Etch requires a companion block theme to provide the WordPress structure and integration its builder needs.
This theme is not simply a decorative starting design. It supports Etch’s intended workflow, including its relationship with the WordPress block editor.
To install it:
- Open the official Etch Theme documentation.
- Follow the current instructions to obtain the theme.
- In WordPress, navigate to Appearance → Themes.
- Select Add New Theme and use the upload option if you have a theme ZIP file.
- Upload the official theme package.
- Install and activate it.
The exact download location may depend on the current account and license workflow. Follow the official instructions if you do not see a direct download link.
After activation, revisit your WordPress dashboard and confirm that the intended theme is active.
Important: Do not casually switch themes during development or after launching your site. Etch’s documentation warns that switching themes can affect layouts and functionality.
Step 3: Claim Your Etch License
License setup can confuse first-time users because downloading the plugin and activating the theme do not necessarily complete the entire setup.
The current official installation guide describes claiming a free Etch Theme license for auto-updates.
Follow these steps:
- Visit the Etch customer dashboard.
- Sign in using the account associated with your Etch access.
- Look for the option labelled Reclaim Etch Theme Now, or its current equivalent.
- Follow the instructions to claim the theme license.
- Open your SureCart dashboard, as directed by the documentation, and locate your license key.
- Download the theme through the account workflow if you have not already done so.
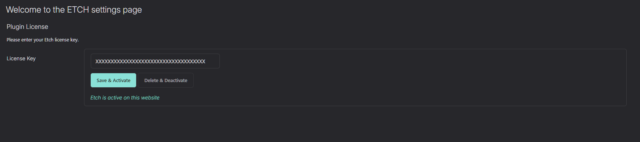
- Return to the relevant license or update settings in your current installation and follow the displayed instructions.
What if you cannot find the license key?
Start by confirming that you signed in to the correct account. Then check the SureCart dashboard and any relevant product or license area.
If the account shows a license-claim action, complete that process before looking elsewhere. If the interface has changed, use the current official documentation rather than assuming an older tutorial still matches.
Never publish your license key in screenshots, videos, public support posts, or article images. Treat it as account-related information.
Once the license setup is complete, return to WordPress and verify that the theme is active and its update functionality is available as expected.
Step 4: Open the Etch Builder
Now you can start working on your first page.
- Open Pages in your WordPress dashboard.
- Create a new page or open a page you can safely use for testing.
- Give it a descriptive title, such as My First Etch Page.
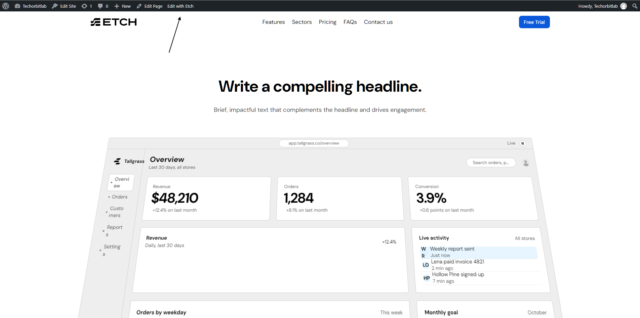
- Look for Edit with Etch.
- Select it to open the builder.
The exact interface can change between releases, so use a screenshot from your own installation when documenting the controls.
Get familiar with the interface
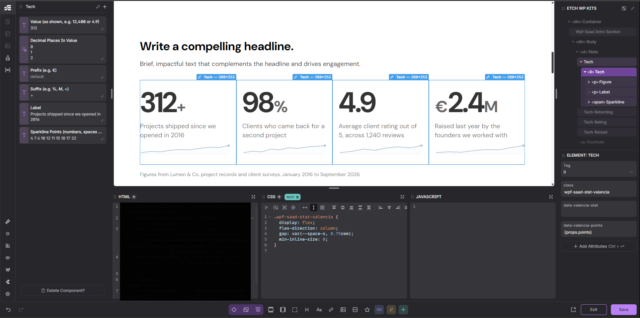
Before adding content, spend a minute identifying the main areas of the builder.
- Canvas: The central area where you view and edit the page.
- Elements and structure: The controls you use to add elements and organise their parent-child relationships.
- Styling controls: The area where you adjust properties such as spacing, typography, colours, and layout.
- Classes and attributes: Controls for identifying elements and applying reusable styles or HTML attributes.
- Preview and responsive controls: The tools you use to check how your page behaves at different viewport sizes.
Panel positions and labels can change. Annotate your own interface screenshot so readers can match each explanation to the current version.
Step 5: Understand the Core Concepts
Before you build the page, learn a few concepts that will help you work confidently.
Elements and structure
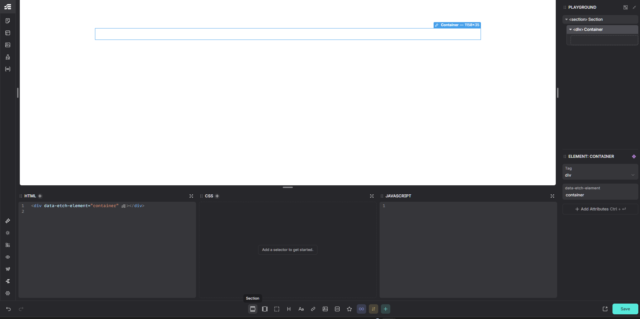
Elements are the building blocks of your layout. A heading, paragraph, image, button, section, and container each serve a different purpose.
Structure describes how those elements fit together. For example, a section can contain a container, which holds a heading, paragraph, and button. Keeping this hierarchy organised makes your layout easier to edit.
Styling
Styling controls how your page looks. You can adjust typography, colours, spacing, alignment, and layout to match your design.
Etch gives you visual controls and access to the underlying CSS. You can begin with the interface and explore the CSS when you need more control. You do not have to write custom CSS for every change.
Classes and attributes
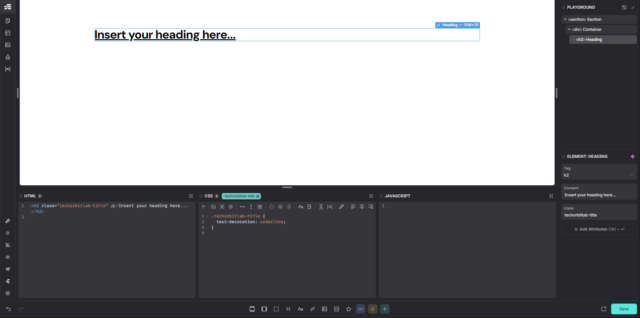
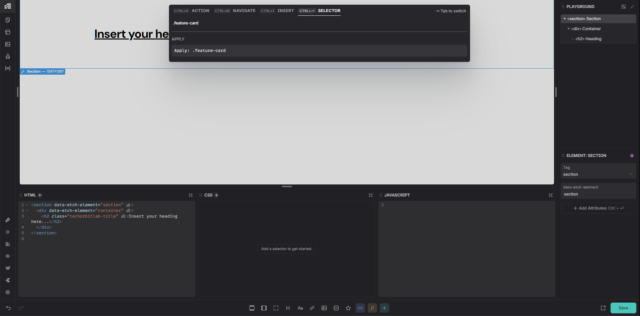
A class gives elements a shared identifier that CSS can target. For example, you could assign the class feature-card to all three feature cards and use a consistent styling approach.
Attributes provide additional information or behaviour for an element. Their purpose depends on the attribute you use, so add them deliberately rather than changing settings without understanding their effect.
Components and patterns
Components and patterns help you reuse designs instead of rebuilding the same structure repeatedly. They become particularly useful when a website has several pages with similar sections.
You do not need to master reusable components before building your first page. Start with a single layout, then explore the dedicated component and pattern workflows in our upcoming Day 4 tutorial and Day 5 tutorial.
Loops and dynamic content
Dynamic content lets a design display information from WordPress or another supported data source instead of relying entirely on manually entered text.
Loops let you repeat a layout for multiple items, such as blog posts or team members. These features are useful for larger projects, but they are not necessary for the static landing page you will build below.
For now, focus on creating a clear layout and applying consistent styles. You can learn advanced dynamic workflows once you understand the basics.
Step 6: Build Your First Page
Let’s put the concepts into practice. You will create a small landing page with a hero section, three feature cards, and a CTA button.
Use your own text and colours. The example below gives you a starting structure rather than a rigid design.
Part 1: Create the hero section
Start with a new section and add a container inside it. The section defines the main area, while the container keeps the content organised.
Add these elements:
- A small introductory label, such as “A BETTER WAY TO BUILD”
- A main heading: “Build Your Next Website With Confidence”
- A short paragraph explaining what your website or service offers
- A button labelled “Get Started”
Choose a heading that communicates the page’s purpose. Avoid vague text that looks attractive but tells visitors nothing about what you offer.
Keep the paragraph short enough to scan easily. Make the button’s destination meaningful, even if you initially link it to another section on the same page.
Part 2: Style the hero section
Select the relevant elements and adjust their styling.
- Set a clear heading size and readable line height.
- Choose a text colour that contrasts with the background.
- Add enough spacing between the heading, paragraph, and button.
- Set an appropriate content width so the heading does not stretch across the entire screen.
- Use consistent colours and typography.
If you are not using a styling framework, you may need to define your own spacing and layout rules. If you use a framework such as Automatic.css, follow its conventions instead of adding conflicting styles.
Avoid adding many decorative effects at this stage. A readable heading, useful message, and visible CTA matter more than elaborate styling.
Part 3: Add three feature cards
Below the hero, add another section with a container. Inside it, create a heading such as “Everything You Need to Get Started.”
Add three cards with a short heading and description for each one.
Card 1: Flexible Design
Create layouts that suit your content and brand.
Card 2: Reusable Styles
Keep repeated elements visually consistent.
Card 3: Responsive Layouts
Make content easier to use across different screen sizes.
Each card should contain a heading and a short paragraph. You can add icons or images later, but start with a clean text-based layout.
Use the builder’s available layout controls to arrange the cards in columns on wider screens. Give each card consistent spacing, padding, and visual treatment.
If you style each card separately, check that the three cards remain consistent. This is also a good opportunity to experiment with a shared class if you are comfortable doing so.
Part 4: Add a call-to-action section
At the bottom of the page, add a final section with a heading, one sentence, and a button.
For example:
Ready to Take the Next Step?
Explore the tools and resources that can help you get started.
Button: Start Today
Give the section enough spacing to separate it from the feature cards. Make the button stand out, but keep its appearance consistent with the hero CTA.
Before publishing, check that the button points to a useful destination. A button that looks clickable but leads nowhere creates a poor user experience.
Part 5: Check the mobile layout
A page that looks good on a desktop can become difficult to use on a phone. Always check the responsive layout before publishing.
Use the builder’s responsive preview controls, if available, and inspect the page at a narrow viewport.
Check the following:
- The main heading fits without awkward wrapping.
- Paragraph text remains readable.
- The feature cards stack or rearrange appropriately.
- Buttons have enough space to tap comfortably.
- No content extends beyond the viewport.
- Images, if used, scale without distortion.
Make adjustments using the responsive styling options available in your current version. If you change a shared style, verify that the desktop layout still looks correct.
At this stage, you have completed your first practical Etch layout. Save your work before moving on.
Step 7: Publish and Check the Block Editor
Once you are satisfied with the design, save your changes and publish the page through the available WordPress workflow.
If the page is already published, save the latest changes and preview the live page. Otherwise, check the page settings and use WordPress’s Publish action when you are ready.
Next, return to the WordPress dashboard and open the same page in the standard block editor.
Etch’s Auto Block Authoring documentation explains how Etch represents content through custom Gutenberg blocks and maintains synchronisation between the two editing environments.
This is an important part of the workflow. You can use Etch to build and style a page while WordPress’s block editor provides a familiar environment for content editing.
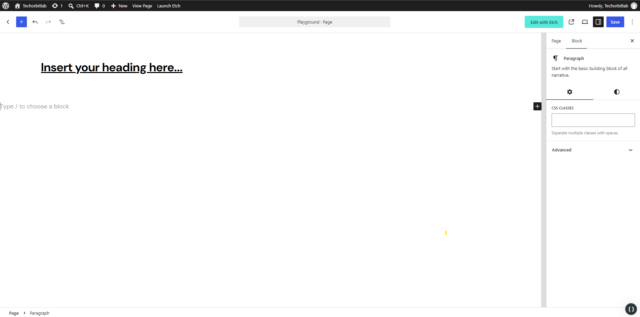
Do not assume every element will appear as a standard WordPress paragraph or heading block. Etch’s current documentation describes custom Gutenberg blocks, so inspect the actual result in your installation.
Make a small, safe content edit in the appropriate editor and verify that it appears as expected. Avoid testing synchronisation on a live page without a backup.
Common Beginner Mistakes and Fixes
1. Forgetting the companion theme
Problem: You install the plugin but cannot access the expected workflow or encounter unexpected behaviour.
Fix: Confirm that the official Etch Theme is installed and active. Review the theme documentation before troubleshooting further.
2. Skipping license setup
Problem: You cannot enable theme auto-updates or find the expected license information.
Fix: Sign in to the correct account, follow the current license-claim process, and check the SureCart dashboard as instructed by the official documentation.
3. Building a complicated page too early
Problem: You start with animations, dynamic content, nested components, and multiple templates, then struggle to understand how everything fits together.
Fix: Build one section at a time. Begin with a heading, paragraph, button, and simple layout. Add complexity only when you understand what each part does.
4. Styling every element separately
Problem: Similar cards or buttons end up with slightly different spacing and colours.
Fix: Where appropriate, use shared classes or reusable styles. This makes consistent design easier to maintain.
5. Ignoring mobile layouts
Problem: Cards become too narrow, text wraps awkwardly, or buttons extend beyond the screen.
Fix: Check the mobile preview before publication and adjust responsive settings where necessary.
6. Assuming the block editor works exactly like Etch
Problem: You expect every design control to appear in Gutenberg in precisely the same form.
Fix: Learn how the current Etch release represents content through its Gutenberg integration. Test the editing workflow on a staging site and consult the official block-authoring guide.
7. Switching themes without checking the consequences
Problem: Your layouts or functionality change after a theme switch.
Fix: Follow Etch’s theme recommendations and take a backup before making significant structural changes.
Learning Resources
Once you have published your first page, use these resources to continue learning.
- Official Etch Documentation: Your main reference for installation, builder concepts, theme setup, and advanced features.
- Create With Etch: Explore additional learning material and practical resources for building with Etch.
- Build With Etch on YouTube: Look for video demonstrations that complement the written documentation.
- Featured WP’s Etch Resources: Discover additional creators and learning material.
- Learn WordPress: Strengthen your knowledge of WordPress fundamentals and the block editor.
If you want to learn Etch WordPress development beyond a single page, move on to reusable components, patterns, and dynamic content. Learn one workflow at a time instead of trying to master the entire tool immediately.
Conclusion
Your first Etch page does not need to be complicated. Start with a clear hero section, three useful feature cards, and a CTA that gives visitors a next step. Once you understand the basic structure and styling controls, you can build more advanced layouts with greater confidence.
Remember to check your mobile design, verify the published page, and test the Gutenberg editing workflow before using the same process on a live project.
Frequently Asked Questions
Is Etch good for beginners?
Etch can be a useful starting point for people who want visual control over WordPress layouts and access to the underlying code. However, it still has a learning curve. Start with simple pages and learn the core concepts before moving into advanced workflows.
Do I need to know code to use Etch?
You do not need to be an experienced coder to begin building a basic page. Etch provides a visual interface, but knowledge of HTML and CSS helps you understand structure, styling, and responsive behaviour. You can learn these concepts gradually as you build.
Is Etch free?
Etch's pricing and access arrangements can change. Check the official Etch website and current product information before deciding whether it fits your budget. The official documentation describes a free Etch Theme license for enabling theme auto-updates. That does not, by itself, establish that every Etch product or feature is free.
Can I use Etch with any WordPress theme?
The current Etch Theme documentation states that Etch requires its companion block theme to function properly. Do not assume that any WordPress theme will support the intended workflow. Check the latest compatibility guidance before using Etch on an existing site.
Does Etch work with Automatic.css?
Etch's documentation includes specific guidance for Automatic.css users, including styling workflows that Automatic.css manages for you. Review the current Etch documentation and the relevant Automatic.css instructions before configuring global styles. Avoid adding duplicate rules that conflict with your framework's settings.